Gift the Joy of Cooking
Instant BiteUnite Digital Gift Card!Croissant

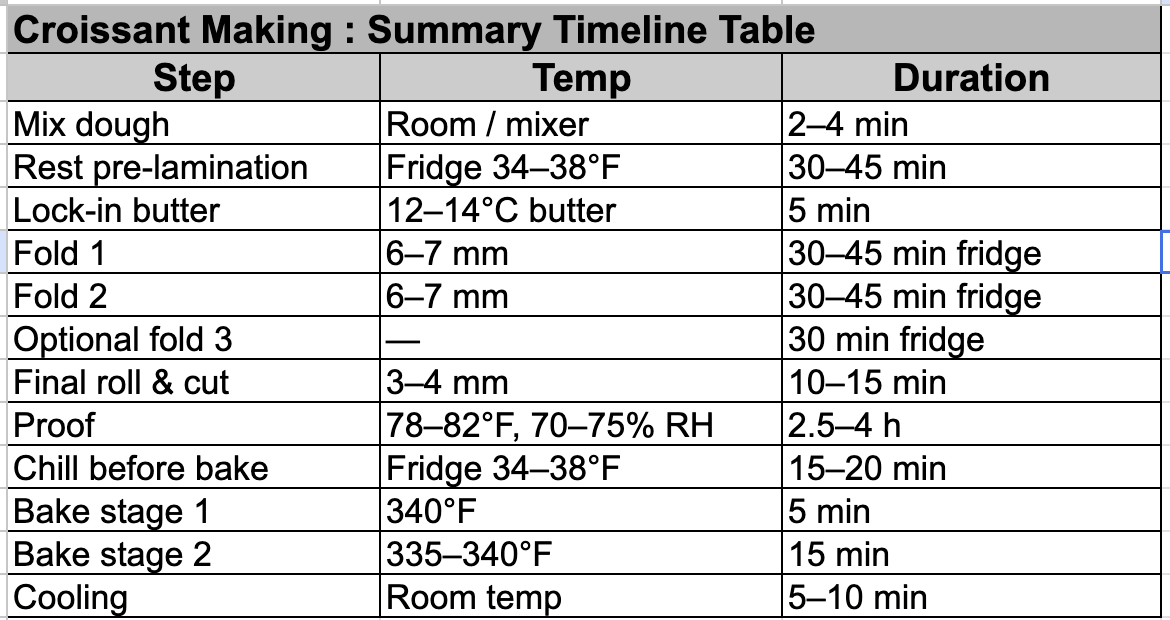
CROISSANT MAKING INSTRUCTIONS
DAY 1 — DOUGH & BUTTER PREP
- Mix the dough (2-8 minutes total, depending on the amount of dough) ,
Dry ingredient & Wet ingredients
- AP flour 250 g.
- Salt 5 g.
- Sugar 20 g.
- Butter 25 g.
- Lukewarm water 100F , 60 g.
-
- Milk 100 F, 85 g.
- Honey 5 g.
- Yeast 6 g.
- Sugar 1 tbsp
Mixing
- 1st speed: 4 min (just combined)
- 2nd speed: 3–5 min
- Dough should be smooth, elastic, NOT fully developed
- Final dough temp: 22–24°C / 72–75°F
❌ Do not windowpane like bread
❌ Overmixing = tough dough + poor lamination
2) Rest the dough
- Shape into square, 6 inch X 6 inch
- Wrap tightly
- Refrigerate 30–45 min
Purpose: relax gluten before lamination
3) Prepare butter block
- Butter thickness: 5–7 mm
- Shape into square, 6”
- Butter temp: 14–16°C / 57–61°F
- Butter should bend without cracking
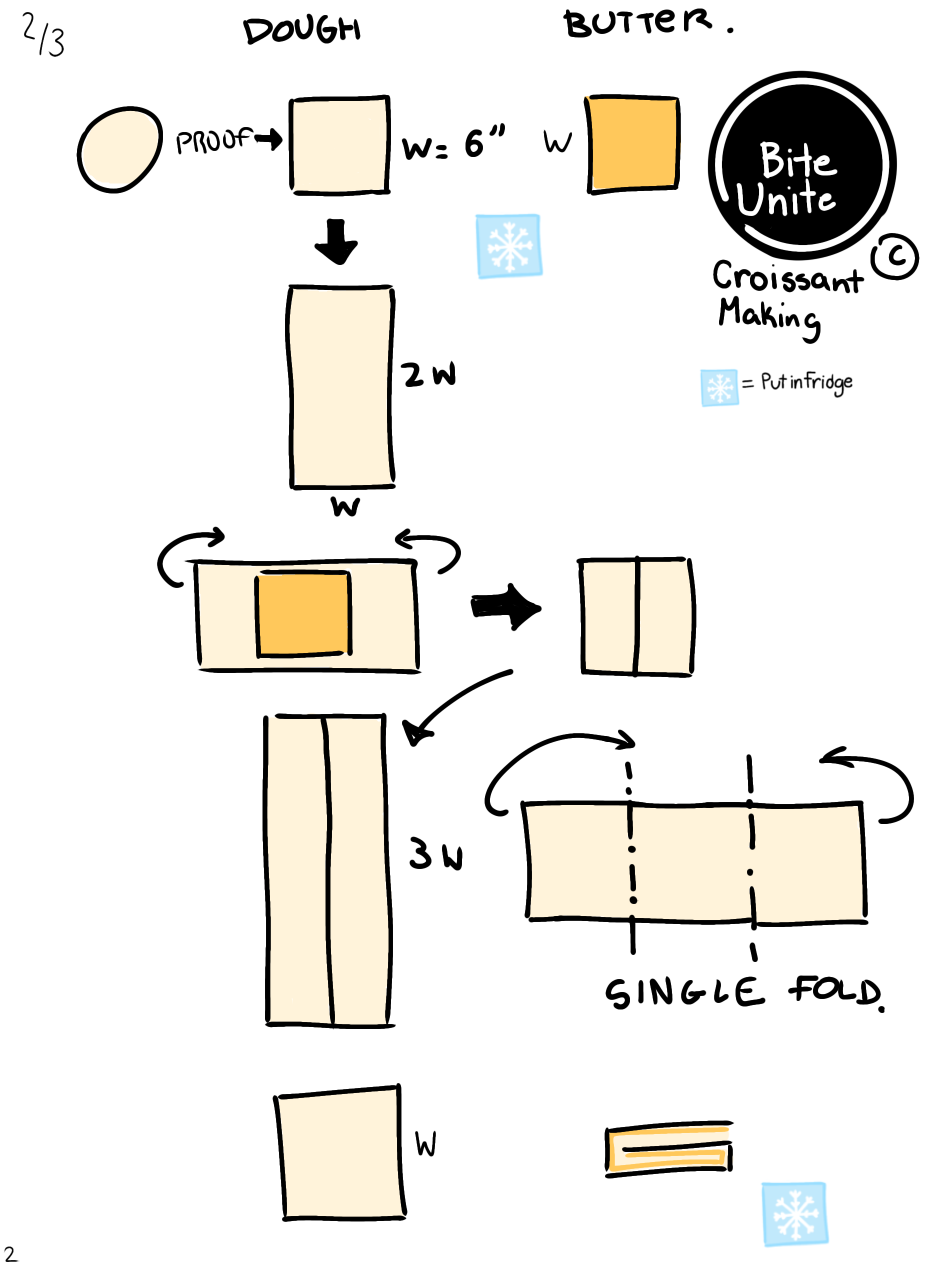
DAY 1 — LAMINATION
4) Lock-in butter
- Roll dough to 2× butter size (See visual)
- Enclose butter completely
- Seal seams gently
5) Lamination turns
Classic schedule:
- 1 single fold (3-fold) or double fold.
- Rest 30 min in fridge
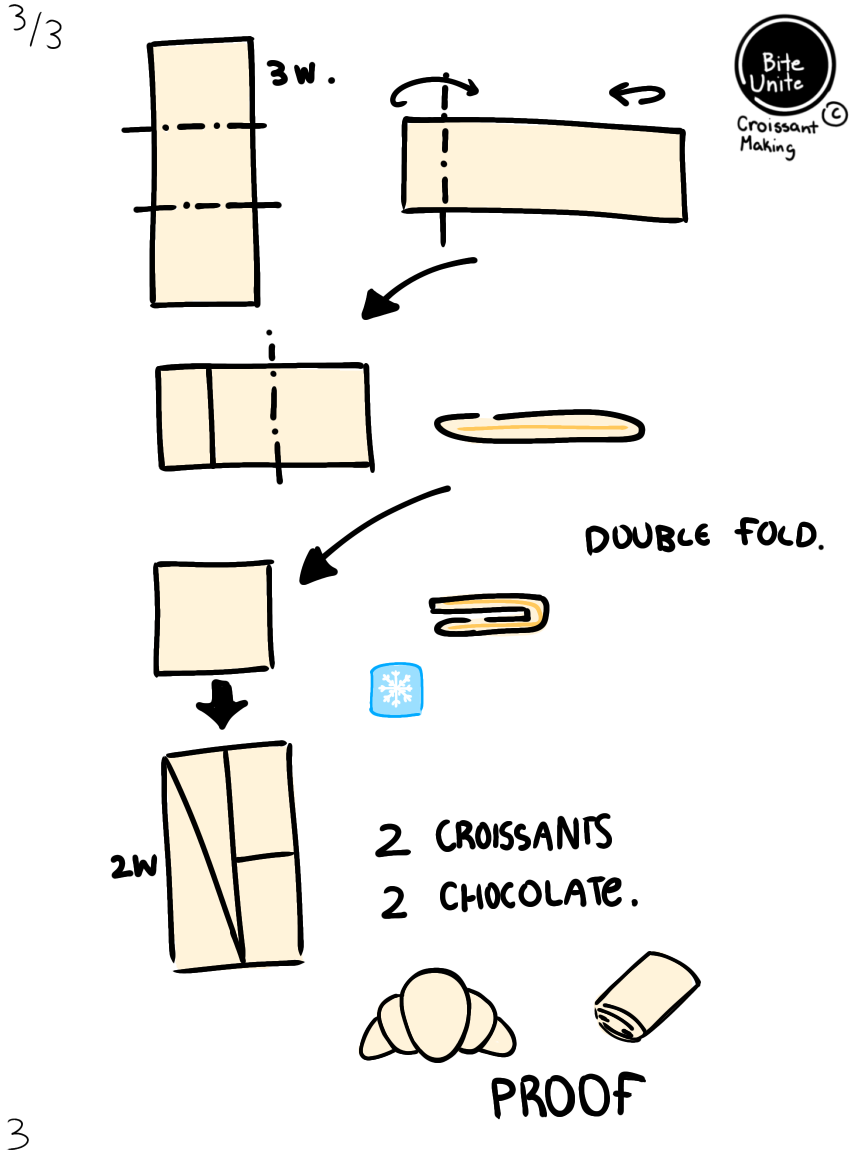
- 1 double fold (4-fold)
- Rest 30–45 min
- Optional final single fold (for finer crumb)
✔ Dough always cold
✔ If butter softens → STOP and chill
6) Overnight rest
- Wrap tightly
- Refrigerate 8–16 hours
This is where flavor + structure develop
DAY 2 — SHAPING & PROOFING
7) Roll & cut
- Final thickness: 3–4 mm , Size W 8" X 12" for 2 croissants and 2 Pain au chocolate. (See visual)
- Trim edges clean
- Cut triangles evenly
- Roll gently (not tight)
- Tip underneath, no pressur
8) Proof
Ideal conditions
- Temp: 75–82°F / 24–26°C
- Humidity: 75–85%
- Time: 2.5–4 hours
Ready-to-bake signs
✔ Doubled in size
✔ Jiggly like panna cotta
✔ Finger dent fills back slowly
✔ Layers still visible
DAY 2 — BAKING (Commercial Oven)
9) Chill before baking
- Refrigerate 15 min
Purpose: reset butter, control oven spring
Baking – Southbend / Commercial Convection.
- 350°F for 5 min. Time varies for regular oven. Need to test
- Reduce to 335–340°F
- Bake 15 min more, Total 20 mins. Depends on the size of the croissant.
- Internal temp: 205–208°F
Rack: lower-middle
10) After baking
- Oven OFF
- Door cracked 1–2 min
- Cool on rack 10 min before cutting
❌ Do not cut hot (will feel raw)
KEY SUCCESS RULES
- Cold dough, cold butter
- Proof until fragile, not strong
- Even thickness = no hollow center
- Oven finishes structure, not proof box
Notes
“Because our class compress a traditional 3-day process into a 3-4-hour classes, croissants may not be identical to long-fermented bakery versions — but you will fully understand the correct steps, timing, and technique to make them successfully at home.”